类别:.Net 跨平台 / 日期:2015-01-23 / 浏览:3579 / 评论:0
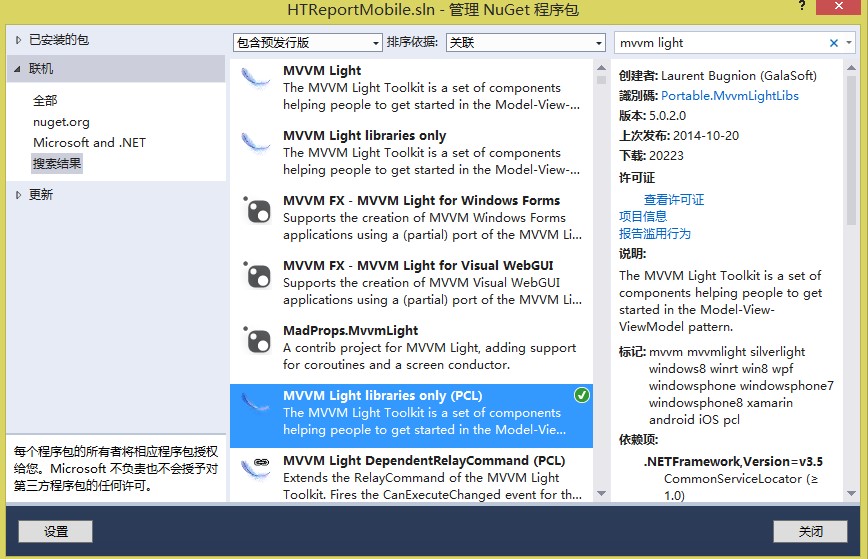
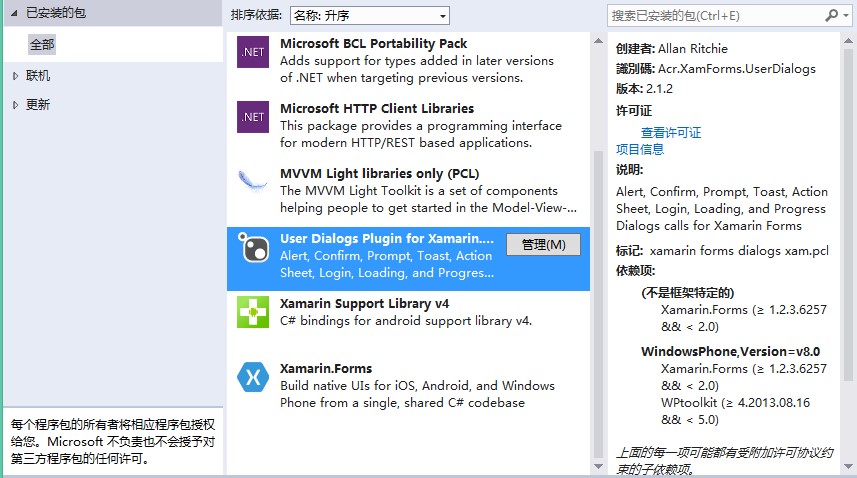
这套UI的布局,让我们不得不想到使用Windows应用商店程序和WPF等程序界面开发的时候所使用的xaml布局的语言,真的是很强大,很多复杂的界面都可以轻松的制作出来。Xamarin Forms也同样借鉴了这样的布局,所使用的形式差不多,但是唯一的缺点是没有设计器来实时查看结果,只有运行了才能知道结果。 这里就要说的是MVVM的设计模式了,不懂的可以百度看下,这里我使用了MVVM Light Toolkit插件帮助我们简化设计,当然还有类似的插件比如mvvmcross,大家可以去试试,接下来我就讲下怎么将MVVM Light Toolkit添加到项目中并且使用。 首先使用NuGet安装管理器搜索”mvvm light“,在结果中选择MVVM Light Libraries Only (PCL)并且给当前所有项目都安装。

经过一段时间的等待解决方案下的所有项目就都安装上了,接下来我们在项目中分别创建View、Model和ViewModel三个文件夹放不同的内容。首先在ViewModel文件夹中创建一个名字为ViewModelLocator的类,并且要添加该类对GalaSoft.MvvmLight.Ioc和Microsoft.Practices.ServiceLocation的引用,代码如下:
public class ViewModelLocator
{
    static ViewModelLocator()
    {
        ServiceLocator.SetLocatorProvider(() => SimpleIoc.Default);
        SimpleIoc.Default.Register<MainViewModel>();
    }

    [System.Diagnostics.CodeAnalysis.SuppressMessage("Microsoft.Performance",
        "CA1822:MarkMembersAsStatic",
        Justification = "This non-static member is needed for data binding purposes.")]
    public MainViewModel Main
    {
        get
        {
            return ServiceLocator.Current.GetInstance<MainViewModel>();
        }
    }
}
接下来,我们在ViewModel文件夹下再创建一个MainViewModel的类,该类继承ViewModelBase,并且添加对GalaSoft.MvvmLight和GalaSoft.MvvmLight.Command的引用,具体代码如下:
public class MainViewModel : ViewModelBase
{
    /// <summary>
    /// The <see cref="ClickCount" /> property's name.
    /// </summary>
    public const string ClickCountPropertyName = "ClickCount";

    private int _clickCount;

    /// <summary>
    /// Sets and gets the ClickCount property.
    /// </summary>
    public int ClickCount
    {
        get
        {
            return _clickCount;
        }
        set
        {
            if (Set(() => ClickCount, ref _clickCount, value))
            {
                RaisePropertyChanged(() => ClickCountFormatted);
            }
        }
    }

    public string ClickCountFormatted
    {
        get
        {
            return string.Format("The button was clicked {0} time(s)", ClickCount);
        }
    }

    private RelayCommand _incrementCommand;

    /// <summary>
    /// Gets the IncrementCommand.
    /// </summary>
    public RelayCommand IncrementCommand
    {
        get
        {
            return _incrementCommand
                ?? (_incrementCommand = new RelayCommand(
                () =>
                {
                    ClickCount++;
                }));
        }
    }
}
接下来我们创建一个MainPage.xaml的页面,该页面的前台布局代码如下:
<?xml version="1.0" encoding="utf-8" ?>
<ContentPage xmlns="http://xamarin.com/schemas/2014/forms"
             xmlns:x="http://schemas.microsoft.com/winfx/2009/xaml"
             x:Class="XamFormsDemo.MyPage">

    <Button Text="{Binding ClickCountFormatted}"
            Command="{Binding IncrementCommand}"
            VerticalOptions="Center" />

</ContentPage>
修改MainPage.xaml.cs中的构成函数,并且在最后添加如下代码:BindingContext = App.Locator.Main; 最后修改UI项目中的App.cs文件,代码如下:
public class App
{
    private static ViewModelLocator _locator;
    public static ViewModelLocator Locator
    {
        get
        {
            return _locator ?? (_locator = new ViewModelLocator());
        }
    }
    public static Page GetMainPage()
    {
        return new MainPage();
    }
}
大功告成,我们来运行看下结果。


发表评论 /